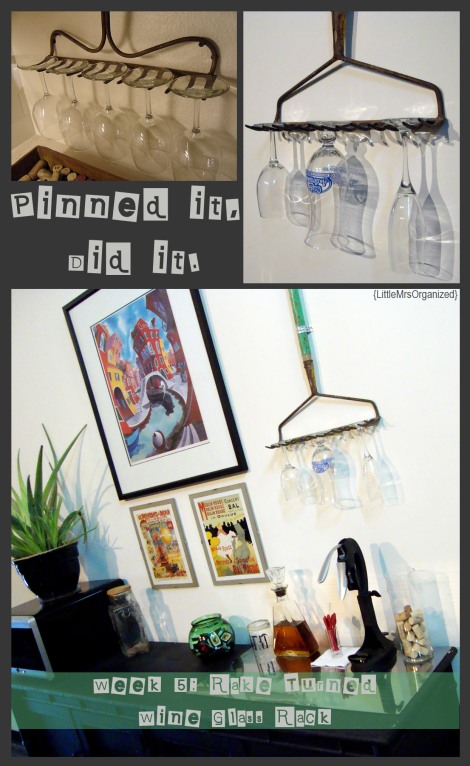
March 14, 2012 New I’ve Moved!
Please follow me to the new LittleMrsOrganized site!
I’ll no longer post here but you can continue the journey with me by clicking the link above…and don’t forget to subscribe over there – thanks for reading 🙂
Tags: blog, littlemrsorganized, moved, new
- Leave a comment
- Posted under Uncategorized
March 2, 2012 Pinned it, Did it. Week 9: Mens Wallet
- Leave a comment
- Posted under DIY/ Craft, Pinned it, Did it.
February 24, 2012 Pinned it, Did it. Week 8: Sweater Pillow
Click here to see how I extended the life of an old sweater, and even made use of the sleeves…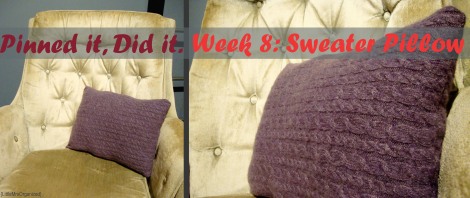
- Leave a comment
- Posted under DIY/ Craft, Pinned it, Did it.
February 21, 2012 Pinned it, Did it. Week 7: Keyboard Magnets & GIVEAWAY
 Yes, it’s week 8. I know. But I’ll be back in a few days with another pinned and done project 😉 I’ve been working on/ still contemplating a blog move…click to read Pinned it, Did it. Week 7: Keyboard Magnets AND to enter the giveaway! Check out the potentially new LittleMrsOrganized site…let me know what you think and I’ll be letting you know when the move officially happens!
Tags: DIY, giveaway, keyboard, keys, magnet, magnets, recycled, upcycled
- 2 comments
- Posted under DIY/ Craft, Pinned it, Did it., Re-uses
February 13, 2012 Pinned it, Did it. Week 6: Paper Gift Boxes
 When I found this tutorial I was so glad to have a pretty, homemade version of the standard boring white jewelry gift box. I happen to have a few extra pieces of scrapbook paper layin’ around 😉 and thought these would not only be great for jewelry but also perfect for dividers in drawers! The original idea came from A Little Hut…a great little blog with all kinds of paper crafts! Patricia has an easy to follow eHow video showing how to make these little boxes and I will post step by step photos below as well…
YOU WILL NEED:
Square paper (cardstock is best, I’m using a 12″ square of scrapbook paper)
Scissors or Xacto knife and cutting mat (I’m using scissors because our cutting mat is M.I.A. – it must’ve run off with my glue gun)
Bone folder or something to crease the edges (I’m using the handle of my scissors)
Make sure to crease every fold very well…
You may have to be a little patient while the how to photos load….
Tags: DIY, Gift box, homemade, little boxes, paper, scrapbook paper
- 2 comments
- Posted under DIY/ Craft, Pinned it, Did it.
February 7, 2012 Pinned it, Did it. Week 4: One Table = Two Nightstands
Alright, here we go…it’s week six and I’m posting week four and five and we’re just gonna move along and pretend like they weren’t majorly delayed 😉
A couple weeks ago I was spending most of my spare time working on our nightstands, as I was browsing through my DIY board on Pinterest trying to figure out what project I wanted to do that week I saw the pin that inspired my nightstands – how did it not occur to me that this was my project for the week?! So the bad news is that I failed to take a before photo, or any in progress for that matter…but it was much more successful than week three! Here’s a link to the DIY Network website where I found the idea, along with some good step by step directions.
So I began my search for the perfect table to slice in half…Salvation army, two Goodwills, several hours at the Peddlers Mall and I finally found a solid wood, square end table with a drawer — for $15!
After I measured and drew a straight line down the middle my husband took it out back, removed the drawer and cut the table in half. We thought about using some of the drawer track to build a shelf underneath but decided to cut it all out for now.
Then I got busy sanding…using a coarser grit and the electric sander along the tops and large flat surfaces, then a fine grit to sand along the edges and in the detailed areas by hand.
Next I sprayed the tables with several light coats of primer. Meanwhile I went back and forth on whether to spray or brush paint these things. Spray paint is one of my best friends in the whole world — but the color options can be really limited and I really wanted a light gray — oh but brush painting can be so time consuming — but more durable in the end — possibly with those streaky brush marks — but it can be done indoors — in the end I decided to just go for it and grab a brush, ok actually I grabbed a foam brush at first because I just really hate those brush marks, but that only lasted about 5 minutes before I realized I just had to use the paintbrush. Luckily, the Mr. had just bought a good brush for a little project he had been working on.
Two (tedious) coats of paint later and I realized that this light gray color was coming off as a weird off white, and a different weird off white than our walls! Since I had paid a little too much for a little quart of paint for a project that was supposed to be cheap, buying a darker color wasn’t an option. So I did the only logical thing to do… Okay, I didn’t exactly “freak out”, but still…Right away she said, “Squirt a little bit of black paint in there and mix it up.” — oh yeah, of course! Thanks mom 🙂 So, also at her suggestion, I poured a little of the light-off-white-gray into a plastic cup and began squeezing in black paint, stirred it up with a wooden skewer and it was perfect! So I went for it, added black paint to the quart little by little stirring very thoroughly — then stirred some more — and maybe a little more.
In the end I had four coats of paint on these things (two light-off-white-gray and two light gray) and they were just the color I had imagined. That handy man of mine built this mounting piece on each of the tables and “hung” them on the wall!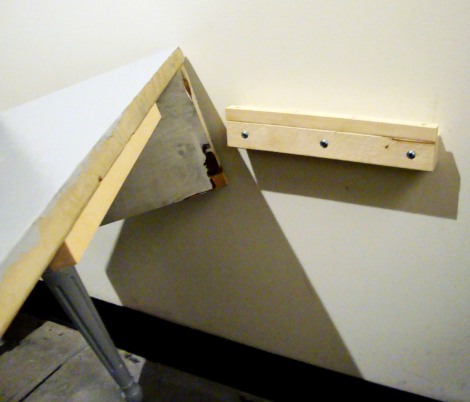 It was a bit hard to get a photo that showed how this works…basically the square piece mounted on the underside of the table just notches into the piece mounted on the wall. Here’s a better view of what the piece on the wall looks like…
 The website where I found the original idea explains a different way of mounting but we wanted ours to be moveable for cleaning, making the bed etc.
Tags: cheap, DIY, nightstand, paint, table
- 3 comments
- Posted under Bedroom, DIY/ Craft, Furniture, Pinned it, Did it.
January 21, 2012 Pinned it, Did it. Week 3: Slip Proof Your Rug
This week I’m trying to slip proof our living room rug…yeah I know you can get those rubbery waffle like slip proof pieces that go under your rugs, but those things never seem to work very long and I found this idea that I thought was worth trying…
I bought one tube of acrylic latex caulk and laid the rug upside down across the bed (to keep it out of reach of the dog and cat). I alternated making lines across each end – because I wasn’t sure if I had enough to do a line every six inches. I had just enough to cover the back of a 4’4″ X 6’5″ rug, with the lines being 8-12 inches apart.
I let the caulk dry overnight and made sure to sweep and mop the floor before replacing the rug.
The Result: FAIL 😦 It’s just as “slippery” as it was with the non slip pad under it.
One thing I will say: we have concrete floors – possibly this would work on another type of flooring. Also, as I said…I didn’t make my lines every six inches – I can’t see how that would make THAT much of a difference but it’s worth mentioning.
Guess I’m off to buy another pack of the non slip pads…
Tags: caulk, grip, rug, rug sliding, Slip proof
- 1 comment
- Posted under Bedroom, DIY/ Craft, Living Room, Pinned it, Did it.
January 12, 2012 Pinned it, Dit it. Week 2: Succulent Brick
When I pinned this idea (found on Apartment Therapy, with a full tutorial on ReadyMade) I thought it would be something fun to do in summer…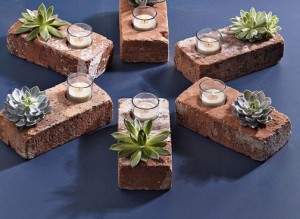 BUT, the other day I found this brick out back…
 And I’ve really been needing to do something with these succulents I picked up super cheap on clearance at Lowe’s…
 Since the brick I found already had holes in it my version is a little different than the one I pinned, but still gives the same effect…with no drilling! There’s not really much of a “tutorial” for this…basically, plant the succulents in the holes 🙂 But here’s a quick little break down of what I did…
First I picked the sticks and little “trees” out of the holes and then scrubbed the sides and bottom of the brick to clean it up a little (I was trying to preserve the moss growing on top)….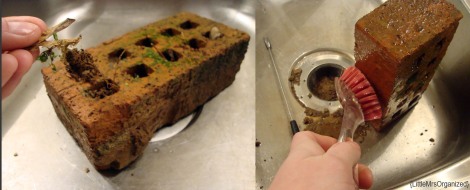 Yes, this would have been much easier/less messy done outside…but it’s cold and rainy out there 😦 Next, I cleaned all of the clay and gravel bits out of the holes…
 Once the brick was ready I filled every other hole with soil from the succulent pots, cut pieces off of the larger plants or used the smaller ones with their roots, poked a small hole in the center of the soil and pushed the succulent into the soil…
  My little succulent brick will live here for the winter to make sure it gets lots of light…
 I can’t wait to move it to the garden when it warms up! Don’t forget to water – Succulents like dry climates so make sure not to over water…I’ll be honest and say that I’m horrible at keeping plants alive inside, so I’m not even gonna act like I’m giving advice on that 😉 I’ve found some helpful info on this website.
- 1 comment
- Posted under DIY/ Craft, Pinned it, Did it., Uncategorized
January 5, 2012 Pinned it, Did it. Week 1: Yarn Dandelions
It’s getting pretty cold out and I’m really missing seeing flowers outside the window. I’m not much on fake flowers and plants, but here’s something fun and a little different from the traditional silk flower arrangement with plastic leaves. Here’s my inspiration(pinned) photo, found on Apartment Therapy… And here’s the super simple process of creating these…
YOU WILL NEED:
-White (or off-white) cotton yarn
-Sharp scissors
-Branches/twigs
1) Begin by wrapping the yarn around your hand – many times…
2) Slide the wrapped yarn off of your hand and tie a 10″-12″ piece of yarn around the middle, knotting very tightly…
3) Holding it by the tail (the piece you tied around the middle) begin cutting the loops…then shake it all out…
4) Using sharp scissors, start trimming the ends to shape it into a ball (trim the tail off too)…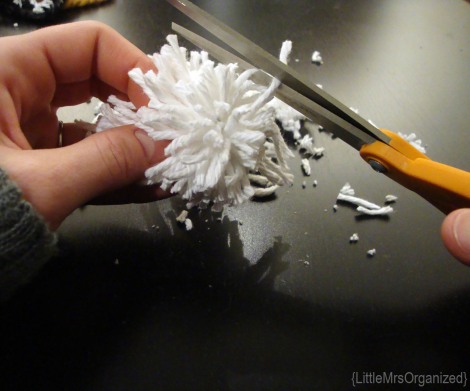
5) Roll the ball around in your hands to fluff it up a little, stopping occasionally to trim pieces sticking out… 6) Repeat step 5 until you are happy with the shape and size…
 7) Go outside and pick up a few sticks out of the yard…
8) You may need to trim the end of your sticks to make a sharper point…
9) Push the end of the stick into the middle of the “dandelion”, you should be able to get right into the center (through that piece that you tied around the middle earlier). Be gentle so that you don’t push all of the yarn out…remember these basically just need to attach, they won’t be moved around too much.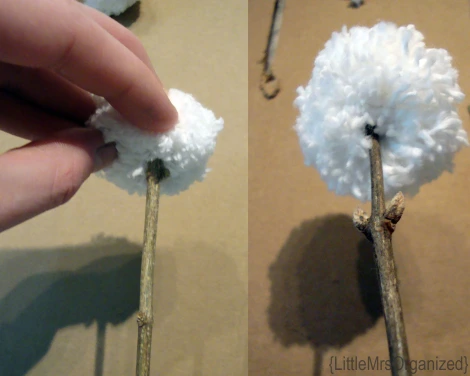
Tags: branch, craft, dandelion, DIY, flower, pom pom, twig, Yarn
- 2 comments
- Posted under DIY/ Craft, Pinned it, Did it.


